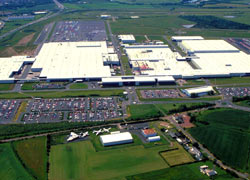
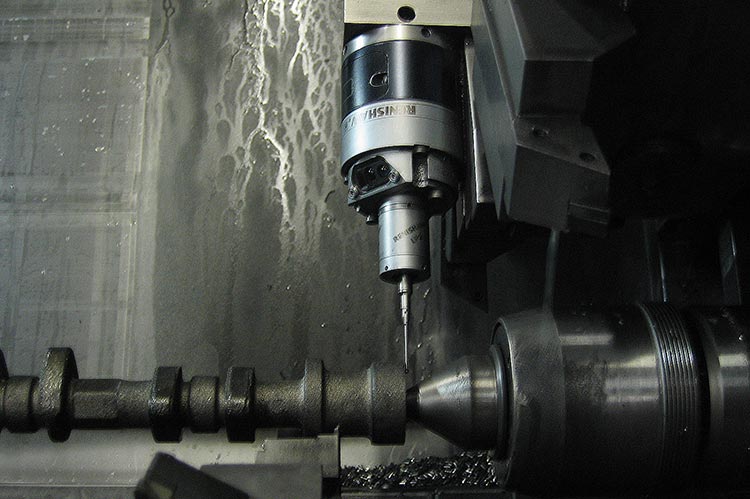
With negative headlines often surrounding the Western car industry, it is easy to forget that major manufacturers continue to operate world-class volume vehicle production facilities in Western markets. The Nissan plant in Sunderland is demonstrating how it is possible to significantly reduce costs to compete against manufacturers based in emerging lower-cost economies. Within their engine plant, the introduction of Renishaw probes onto four CNC twin turret lathes has led to an initial saving of £250,000 ($400,000).
The Nissan plant at Sunderland was set up in 1986, with two dedicated camshaft production lines following in 1991. Nissan’s continual development of new car models and wide variation in engines meant that a completely fresh approach had to be taken in 2001 to meet future production needs.
Simon Edwards, the engineer responsible, explains;”It was clear that the current lines could not manage the complexity of the new generation of camshafts so we defined a new camshaft process that replaced two dedicated camshaft lines to form one flexible line. The new line occupies half the floor space of the two originals whilst maintaining the same output. In 2002 we were juggling 14 variants of camshaft through the new line; currently, we produce 6 variants.”
Probing meets resistance
Nissan’s Sunderland plantMr Edwards joined Nissan after working at Michell Bearings, where he had used Renishaw’s spindle probe systems on machining centres, and knew that introducing probes was easily the best way to achieve the objectives. “I had to use the existing machines where possible to produce the new camshafts in order to reduce investment, so I selected four Okuma lathes – two were 14 years old and two were eight years old. I looked at using the existing dedicated machining techniques, requiring us to maintain good quality on these machines, and checking finished camshafts on dedicated post process gauges. The initial quote for a stand alone flexible gauge to cope with the vast differences was $400,000, so I considered a turret mounted probe that would utilise the lathes’ flexibility to manage the number of variants, working out at a total of $40,000 for the 4 facilities.”
 According to Mr Edwards, there was significant initial resistance from the machine operators and other engineers, as they did not want machine time spent on what they saw as measuring operations. The common feedback was that ‘machines are there to cut metal, not measure!’
However, Simon Edwards was determined to make the changes. “It all comes down to the fact that we needed to hit a certain cycle time to get the throughput, so I did everything I could to shave the machining time and add in the probe operations. This was mainly through smart use of the twin turrets. In the end, with the probe operations included, the whole cycle time is now less than the previous machining-only process”, he explained.
The initial anti-probe attitudes have now reversed, as he described. “If I go down there now and suggest we remove the probes and the software, the lads wouldn’t let me near the machines!”
Zero scrap after almost 2 million parts
So how have probe systems made such a dramatic impact and won friends at Nissan? The key areas reported are part set-up and post-machining inspection, where new processes have had a dramatic impact on scrap levels.
The camshaft castings arrive at the lathe cell with the front face qualified, and each one is manually loaded. After approximate positioning, the machine tailstock clamps the casting in place and, on every component, uses the turret-mounted Renishaw probe to find the front face in a matter of seconds. The 2 turret offsets for the subsequent machining program are immediately updated by comparing the measured position to the nominal value, with any variation subtracted or added. The machine then cuts multiple surfaces on the shaft referencing all machine positioning to this compensated zero point – total cycle time 90 seconds.
 Simon Edwards is quite happy to make a bold statement at this point – “To my knowledge there has never been a scrap component on these machines as a result of this process. That’s out of 550,000 camshafts a year. In fact we are now nearing something of a milestone; this year we will reach two million good parts. This process of redefining the datum has had implications for the processes upstream from the lathes and this is where the scrap has disappeared completely. We now have general tolerances for key features at these operations where very tight tolerances used to exist. This has also increased facility efficiency with minimal downtime experienced on these operations through addressing historic quality concerns.
Inspection of finished camshafts to update tool offsets
The other application of the Renishaw turret-mounted probes is sample inspection of finished components after machining. The positioning required on most features is not tight, typically ± 0.2 mm, but it is vital that it is closely controlled, otherwise it will tend to drift. Typically the probe takes about 40 seconds (or up to 60 seconds for a few longer shafts) to check the 17 defined features, automatically updating tool offsets with any variation as it goes. Originally, this check was done after every 10 shafts, but experience of actual tool wear has reduced this to a check after every 20 parts.
Productivity transformed through “hands-on” engineering and cost-effective probing
Mr. Edwards spends a lot of time on the camshaft line, because as he says, “All these gains are made by production engineers working directly with the process and being aware of concerns as they happen. These old machines have been given a new lease of life because they now have intelligence via the probe and can therefore react to issues as they rise. New machines won’t get through the door now without probes. So far, as value for money goes, they are easily the best bit of kit we’ve got on the camshaft line.”
Process traceability
The whole system is calibrated on the CNC lathe in just a few minutes using an automatic cycle with a master part. This is the standard by which traceable quality is guaranteed.
Probe use becomes standard practice
Each CNC lathe has a document permanently attached that details the use of the measurement system within the manufacturing process, acting as a constant reference for every operator. The document lists the four key reasons to trigger post process measurement using the Renishaw probe:
- Maintain general quality i.e. measure key features at a set frequency (20 parts).
- Tool change. The tool management system on the lathe is interrogated every cycle to determine a full change or a single change. A full tool change will result in the measurement of all features whereas a single tool change will only measure the relative feature machined by that tool.
- Variant change.
- Start of shift or first off part. The part counters on the lathe are monitored every cycle. This is particularly important when the machine is started from cold on a Sunday night.
With the dramatic improvements in Nissan’s manufacturing capability, and the integration of probing as standard practice, any initial resistance now seems a distant memory.
Nissan’s Sunderland site and the camshaft line
The vast Sunderland site encompasses most of the manufacturing processes necessary to build and assemble all the piece parts for Nissan cars, whether within Nissan itself or through the multiple independent parts suppliers located around the perimeter.
Visitors are immediately struck by the high standards of cleanliness and positive enthusiastic attitude of the operators and engineers. Maybe other manufacturers have something to learn.


