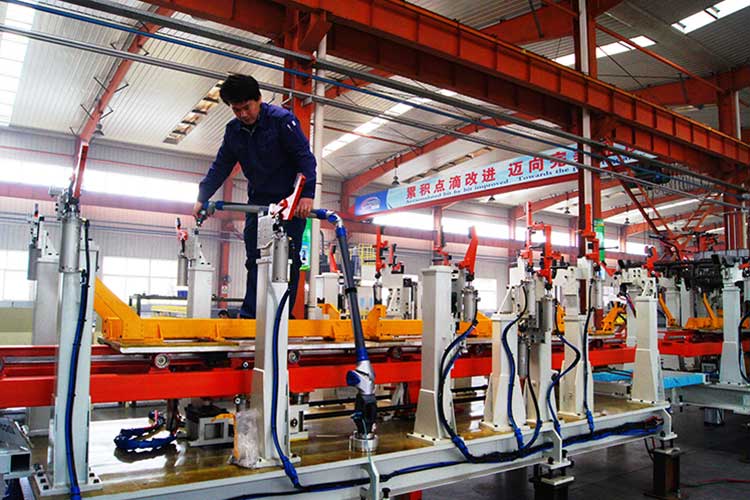
As tool manufacturing standards and testing methods continue to improve, the welding industry now requires highly accurate and reliable inspection checks in every part of the process. This includes inspections for fixture frames and supporting tools such as check fixtures and molds.
Since implementing several measurement solutions from FARO, Chinese systems integrator MH Robot & Automation Co., Ltd. (MH Robot & Automation), has managed to enhance the precision and stability of its welding and assembly equipment systems, as well as improve the overall precision of its production line and conveyor systems.
More than a Decade of Trust: High Accuracy and Reliability of FaroArm
MH Robot & Automation is a systems integration service provider for industrial intelligent manufacturing equipment. Part of the high-end equipment manufacturing industry, the company qualifies for funding under one of the seven strategic emerging industries that receives key support from the state. MH Robot & Automation engages in the design, manufacturing, installation of industrial intelligent manufacturing equipment, and the planning and design of large-scale industrial manufacturing bases. Its core products include design plans, robotic workstations, coating systems, mechanized conveyor systems, welding systems, electronic and central control systems, and power substation systems.
In its early days during the factory setup for MH Robot & Automation, the company decisively purchased the 3m, six-axis FaroArm when selecting measurement devices for its welding business. “We first came into contact with the FaroArm back in 2003,” said Mr. Lan Chunli, General Manager, MH Robot & Automation. “We have always recognized its superior accuracy and reliability.”
An Overall Solution: FARO Provides Measurement Guarantee for the Entire Production Line
As MH Robot & Automation became more familiar with the various applications of the FaroArm, the team began using it in more areas of the factory. Apart from inspection checks on the entire welding process, the FaroArm is also used in the processing and alignment of finished products such as heavy machinery, agricultural machinery, and robotic welding stations.
When the business expanded in 2013, MH Robot & Automation needed to measure large fixtures of at least 7m within tight tolerances of 0.02mm. Mr. Lan then decided to purchase the 3.7m FARO Prime, a new model from the FaroArm product line. Consequently, in 2014, the leadership at MH Robot & Automation set a goal to further increase accuracy and raise productivity. For that reason, the company surveyed the market for suitable measurement products. After much deliberation, they finally decided on another FARO product – the FARO Laser Tracker Vantage.
Flexibility and Variety: FARO Allows Product Diversity and Consistent Quality
Since its inception, MH Robots & Automation has valued and achieved rapid development consistently. Right from the beginning, the company utilized its first FaroArm very well, performing measurements on three sets of fixtures daily. With its current annual output value of RMB20 million, the initial capital investment has long been recovered, with profit generated in excess of costs within just its first year of purchase.
The FARO Vantage is a highly accurate laser tracker that offers measurement routines at unprecedented speed and efficiency. Its patented TruADM technology, SmartFind enhancement, compact form factor (224mm × 416mm), as well as its water and dust resistant IP52 rating makes the FARO Vantage a robust and truly portable device. The FARO Vantage can be deployed to the shop floor for measurements whenever required. This is especially useful for the team when conducting in situ inspections of conveyor systems at their clients’ sites. For a 150m-conveyor line, accuracy is within 0.2mm, providing clients with reliable data support.
Mr. Lan emphasized, “Each of FARO’s products automatically generate test reports. This function simplifies our work greatly when it comes to goods delivery, as it provides data support to our clients when inspecting and accepting the products. Concerns on misunderstanding or unnecessary rework have been eliminated, as measurement results are highly reproducible across technicians.”


