“Everything adds up to accuracy. It’s our purpose as a company,” says Stephen Flynn, president of Optical Gaging Products (OGP), a division of Quality Vision International (QVI). “Manufacturers of high-accuracy, leading-edge products require precision-engineered measurement and inspection equipment that can guarantee definitive accuracy. In order for our equipment to meet this demand, we require a high degree of precision machining from our machine shop.”
Founded in Rochester, N.Y., in 1945, QVI is a global leader of metrology solution. Its brands include OGP, VIEW Micro-Metrology, Quality Vision Services, RAM Optical Instrumentation and Certified Comparator Products.
The shop at the Rochester headquarters is key to the company’s highest quality metrology devices, producing precision parts that can make or break the equipment’s accuracy and reliability. Machining these precision parts in-house gives QVI complete control over their products and enables them to use their own metrology expertise to verify the accuracy of parts they make.
“You always want your measurement gauges and equipment to be more accurate than the specs you need to measure,” says QVI Shop Floor Manager David Wolf. “Likewise, our products must be more accurate than what our customers are measuring. We’re fighting the same battle as our customers—always improving accuracy and precision machining capabilities so we can deliver superior products.”
 Visionaries in Precision Metrology
“To stay current with customer demand, we provide a diverse product range covering a wide spectrum of industries,” says Flynn. Starting with a selection of 50 standard-model machines, QVI is also capable of engineering a metrology solution ideal for specific customer applications.
“The final product we deliver represents measurement devices and services we use internally,” says Flynn. “We work at the shop-floor level with our customers, helping drive our products ahead of most manufacturing trends. A good example of this is OGP’s emphasis on multisensor systems.”
OGP’s multisensor measurement systems contain a variety of sensor types, often including lasers, touch probes, microprobes and other sensors working in conjunction with their video measurement technology to measure the most critical components and difficult-to-measure features. QVI’s engineering department designs these metrology systems with broad customer applications in mind.
“A multisensor measurement system can provide extremely detailed measurements, doing precise measurements of more dimensions in a single part setup,” explains Wolf. “Since the sensors work throughout the system’s usable volume, overall accuracy relies on the base-model construction, which is why we focus on producing the base-model precision parts here in Rochester.”
QVI’s manufacturing partners produce the components of some of their products, but they keep the precision machining of critical components in-house to control final quality and accuracy. OGP’s SmartScope® Flash™ 302 contains several critical components machined by QVI at its Rochester location.
Smartscope Presents Manufacturing Challenges
QVI began development of the SmartScope Flash 302 for OGP in 2007, a CNC benchtop multisensor system that can accurately measure parts within its 300-mm-by-300-mm-by-250-mm volume. “A key to manufacturing the 302 was a high strength-to-weight ratio,” says Wolf. QVI had to meet tolerances typically machined in hardened ground tool-steel but did it in aluminum to reduce weight.
The Flash 302 is the largest benchtop machine in the OGP inventory. Aluminum comprises 90 percent of its weight. These tight tolerances as well as high production goals and critical precision parts, such as the base plate and X-axis yoke, made it clear to QVI that their current lineup of machine tools was unable to meet the 302’s manufacturing requirements.
“Most machine tools require a sacrifice in accuracy for a larger work envelope, which we couldn’t afford,” says Wolf. “And while profitable machining for us once meant utilizing machine tools long after they were paid for, the 302 required capabilities that could only be found in modern, precision machining centers.”
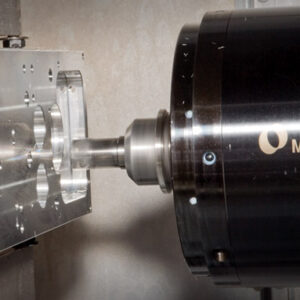
QVI evaluated horizontal machining centers from several manufacturers, based on the specific design and engineering requirements of the 302 yoke, which moves in one axis and carries the sensors that move on it in a perpendicular axis. (The third axis moves across the base.) Two of the yoke’s most critical features, a pair of identical bores located on opposite ends of the part, required bore accuracies of ±5 micron, while holding location tolerances to ±2.5 micron. In assembly the yoke must hold better than 1 arc second per inch of travel.
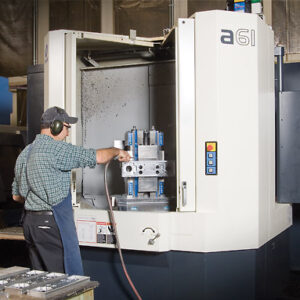
“Most horizontal machining centers use a vertical machining center spindle on a horizontal plane. Makino’s a61 was designed with a slant column structure for a stronger Y-axis that resists Z-direction cutting forces,” explains Wolf. “We told Makino Y-axis straightness travel of less than 10 arc seconds was required, and they were the only builder that immediately responded that wasn’t a problem. In fact, when we measured the a61, we found it exceeded all the tolerances Makino listed, including Y-axis straightness, which we measured at 4 arc seconds.”
QVI’s a61 has a 14,000-rpm spindle, allowing the use of high-speed tools and advanced tool holders that let them achieve surface finishes of 0.8 RMS and 2- to 3-micron roundness tolerances. The a61 exceeds all tolerance requirements and is even used to machine prismatic components with tolerances that require single setup machining to eliminate stack-up error. While the company originally anticipated the need to purchase a $50,000 trunnion fixture to accomplish this task, the a61’s rotary table provided the positioning accuracy to machine the parts without extra equipment.
In addition to providing the necessary precision machining accuracy, with the a61, QVI experienced increased machine tool reliability, essential to the fast production of precision parts for the 302.
Maintenance requirements were another pleasant surprise. “We had come to expect way cover replacements every two to three years, which often entailed long periods of machine downtime,” says Wolf. “The a61’s way covers show no signs of degradation after two years of heavy use.”
 Increasing Throughput
Wolf continues, “The a61’s capabilities are exceptional, exceeding our expectations and impressing even the most skeptical in our shop. In addition to meeting the yoke’s accuracy demands, the machine’s rapid acceleration/deceleration rates and 0.9-second tool changes have reduced part cycle times by 50 percent.”
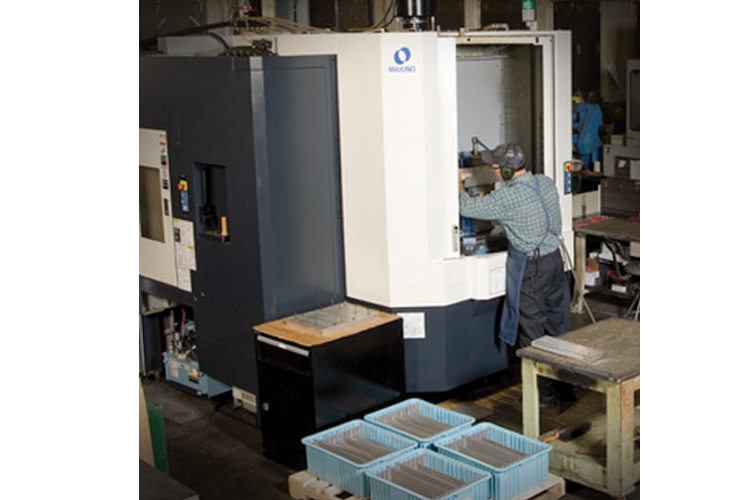
Nearly two years after purchasing the a61, QVI approached Makino again for a machine with a larger work zone and high metal-removal rates. They chose a Makino a81 horizontal machining center.
“The 302 base plate requires serious metal removal that our previous machines could not complete fast enough, causing large backlogs,” says Wolf. “Since we got the a81, base plate roughing times have reduced by almost 70 percent while still achieving the required 5-micron tolerances.”
To further reduce cycle times and retain the highest accuracy, QVI purchased a multisided fixturing vise that enables the a81 to machine all six sides of the base plate in one setup. Operators use the a81’s two-pallet system to fixture additional base plates, reducing out-of-cut time and increasing throughput.
“The slowest operation of the base plate was the final finishing procedure due to the straightness and perpendicularity requirements of the 302’s structural supports,” says Wolf. “Increased roughing accuracies reduced finishing times and sped 302 production, allowing us to achieve a much faster than expected ROI on the a81.”
Verification
QVI’s knowledge and experience in precision metrology provide them with unique inspection and machine verification resources unavailable to most machine shops. One such resource is QVI’s Chief Metrologist Eric Gesner, who uses the unique Etalon LaserTRACER® volumetric accuracy test equipment to measure geometric errors in the working volume of a machine tool. The device’s core component is a laser interferometer with nanometer resolution that automatically follows a reflector to measure distance and calculate accuracy.
“Our products don’t just measure accuracy. They define it,” says Gesner. “To accomplish this, we calibrate and compensate machine tools using volumetric error mapping and compensation technology.”
After a year of service, QVI performed machine calibration tests on the a61 to qualify and verify the machine’s accuracy. The results showed an average of less than a 3-micron error in straightness accuracy for all axes. Gesner attributes that good performance to the machine’s design elements, which include rigid construction and features such as glass scales. Using the LaserTRACER, QVI was able to tweak the a61 even further, resulting in submicron positioning accuracies. The Etalon software outputs a volumetric error map that is downloaded to the machine’s Fanuc controller’s 3D Error Compensation option. Verification of the straightness errors after volumetric compensation showed a threefold improvement with an average of less than 1-micron error in straightness accuracy for all axes.
“We found the dynamic accuracy of the a61 to be excellent, even after an extended period of service,” says Gesner. “The machine’s design has ensured superior performance in terms of geometric, thermal and cutting-force characteristics. These tests don’t lie, which is why we use these same inspection techniques on our products.”
Measuring Future Growth
“Our precision machining processes must be superior in order to provide our customers with equipment that provides definitive accuracy and constant reliability,” says Flynn. “No matter how complex parts become, we have to provide measurement capabilities that are ahead of the trends. To accomplish this, we turn to high-performance machining technologies that provide the same performance we expect from our own machines.”
“Being a market leader in measurement equipment requires the ability to produce parts with accuracies beyond our customers’ required specs,” adds Wolf. “This shop isn’t afraid of new technology and with the results we’re seeing out of our a61 and a81, we’re more excited than ever to push the envelope of measurement standards. When your purpose as a company is accuracy, you can’t settle for anything less.”
Courtesy: Makino


