5 ways that 3D measurement improves quality & productivity for the automotive industry
In the manufacturing world, the notions of efficiency, quality, and cost are most often surfaced as top concerns when it comes to product development and execution. Companies are constantly on the look out for solutions to improve workflow, either by doing more with less, eliminating activities that do not add value, or by increasing production volume through innovation.
For an automotive manufacturer, this would mean a hastening of its time-to-market or an improvement in production speed, all without compromising product quality. While 3D measurement systems are not new to the industry, here are five ways in which they have been simplifying workflow and lowering overall costs for automotive industry users.
1. Rapid Prototyping of Virtual Models & Reverse Engineering
Clay modeling is a technique that car makers of today still rely on , despite the advent and ubiquity of 3D computer modeling systems. Clay models range from scale- to full-sized vehicles, and include mock-ups of interiors and a variety of other parts (e.g. wheels, trim components, and steering wheels).
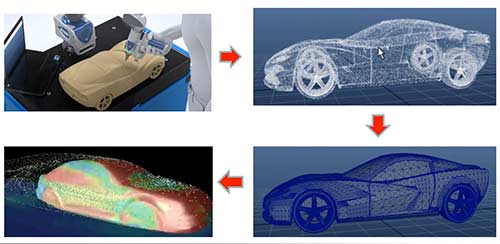
As a design process may start off with a clay model, manufacturers have found it useful to be able to perform a quick scan on these models in order to convert them into digital data that computer-aided design (CAD) programs can further evaluate or manipulate.
In fact, manufacturers now have access to devices that possess both contact and non-contact measuring capabilities, which essentially integrates the 3D modelling processes into a single step. Using a portable laser line probe, users can quickly and easily digitize the clay model. Once generated, the virtual model can then be distributed to various departments for further evaluation and design review. Examples of such tests include computational fluid dynamics (CFD), finite element analysis (FEA), wind tunnel airflow simulation, crash simulation, and others.
Furthermore, potential problems can also be identified before the parts are brought together for assembly. In fact, a virtual assembly of parts can be performed even before parts are shipped to the plant. The ability to ‘assemble’ components this way is a requirement for companies that subscribe to the digital factory vision, and it can amount to significant cost-savings for a car manufacturer.
Engineers often also rely on 3D imagers to extract CAD data from an existing part, so as to use the data for reproduction or for design modifications. 3D imagers can be integrated into the production environment as required, whether in conjunction with a rotary table, robot, or industrial inspection cell. And technological advancement has enabled metrology suppliers to come up with 3D imagers that provide high resolution scans, process data on-board, and allow adaptable multiple imager arrays, all of which push the envelope to shorten inspection cycle time. With the advent of such technology, automotive manufacturers in search of an effective way to conduct in-process or near-process inspections have more options than ever before.
2. Body Panel & Stamp Die Inspection
A passenger car typically consists of hundreds of stamped, shaped metal parts, including structural components, interior panels, and visible panels (e.g. hood, fender, door, roof, etc.) that form the ‘look’ of the car. The quality of the visible surface of these parts is crucial to the overall aesthetic appearance of the finished vehicle, and is affected by the quality of the stamp die on which it is formed.
A stamp die commonly goes through several modifications before it produces a good panel part. This means that the surface of the die might look considerably different from its initial CAD model by the time it is ready for mass production. Auto manufacturers usually capture a scan of the modified press die, so as to update the CAD model to reflect these changes. In case the stamp die is damaged or altered in any way during transportation, or if an additional one is required, a second one can then be reproduced easily.
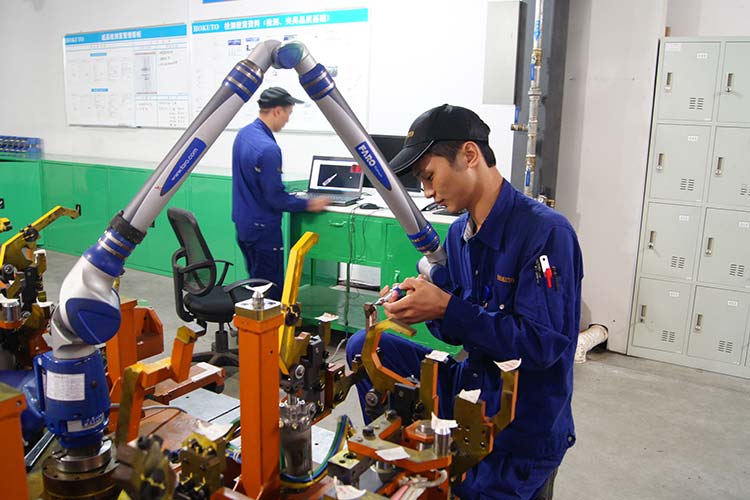
Portable coordinate measuring machines (CMMs) such as laser trackers and articulated arms have proven to be exceptionally useful to engineers for these types of inspection jobs. As test panels and stamp dies are typically bulky and heavy, the ability to perform in-line inspections is highly valued. Instead of transporting an object of interest to a climate-controlled room for measurements, the engineers can simply bring the portable CMM to the production line. This helps the company to save on time and manpower, and also improves workplace safety.
3. Production Fixture Inspection
Production fixtures are used to securely locate or control the position of a work piece, such that it remains in a specific orientation. By impeding all degrees of freedom, the tool allows an operator to perform the same action to each work piece consistently.

A poorly developed fixture can cause problems down the production line, as minor errors on components will be compounded during assembly. For example, a slight variance from design specifications at the component level may translate to a misalignment during the welding process. These types of issues can lead to an eventual product recall or time wastage (e.g. rework, root cause analysis), and inflict a dent on the company’s reputation. For these reasons, automotive manufacturers typically inspect their production fixtures with a reliable measuring tool to ensure accurate positioning of all critical components. In doing so, they eliminate any potential issues early in the production process, and save on costs, time, and their reputation.
For the purpose of production fixture inspections, manufacturers have found portable 3D measurement devices to be an effective solution, mainly because they provide versatility and high accuracy at the same time. As mentioned earlier, engineers can move a CMM to the production fixture when performing an inspection, eliminating the need to transport the fixture to an inspection station in another part of the facility. This reduces production turnaround time, and ultimately increases productivity for the manufacturer.
4. Gap & Flush Measurements
One of the most common in-line inspection processes conducted on finished products in an automotive assembly line is the gap and flush measurement. The purpose of this test is to check for horizontal and vertical distances between two closely located parts (e.g. the exterior surface area between the car door and car body), to ensure that they are within design tolerance.
This test is an important one as it determines the visual ‘fitness’ of a car, Also, this allows the engineers to eliminate any rattling that may occur when the car engine is running. Automotive OEMs are increasingly strict about controlling the gap and flush tolerance, some to within a window of ±0.3mm. At this level of precision, manufacturers call on improved measuring tools and methods such as portable CMMs with laser scanning capabilities to perform the task.
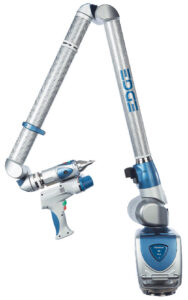
One such device is the FARO® Edge ScanArm HD, which features a laser line probe that provides non-contact scanning capabilities. Laser scanning is an ideal way to create a dense point cloud for inspection or reverse engineering purposes, and is a quick way to obtain a full surface model of a part.
The device projects a laser line on the part to be inspected, which is reflected back towards the scanner and captured by a camera. Through standard triangulation methods, 3D locations are determined and recorded accordingly. By moving the laser line across the entire surface, the probe captures the 3D profile for further processing.
5. Car Seat Ergonomics
In the development of car seats, the ‘hip point’ – which is the theoretical, relative location of an occupant’s hip – is of particular interest to manufacturers, for both design and regulatory requirements.
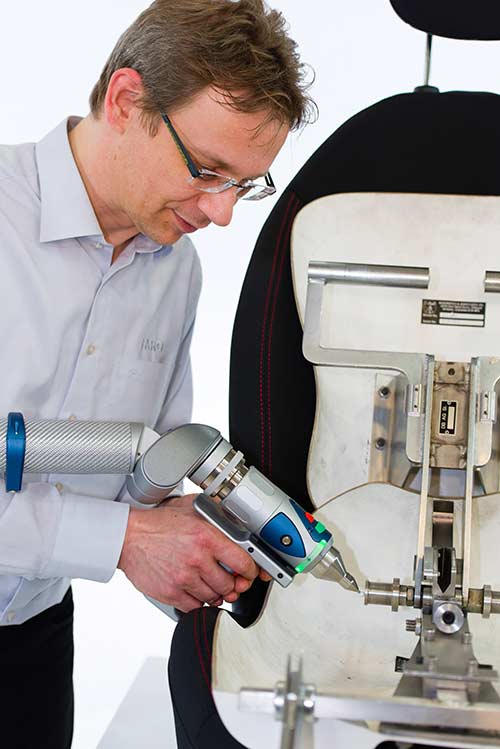
Importantly, manufacturers must ensure that the hip point is within safety tolerance. A portable 3D measurement system such as an articulated arm allows safety engineers to complete their checks swiftly and easily. Encoders in the articulated arm determine and record the location of the ball probe in 3D space and report the results through software. Using the coordinates of the hip point obtained by the CMM, the engineers can then determine the critical safety of a passenger during a crash, and also accurately implement necessary safety features.
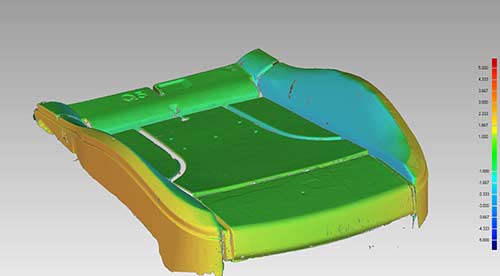
Apart from the ‘hip point’, the other aspect of car seats that manufacturers are interested in is the foam component. Using non-contact measurement methods, engineers can obtain scans of foam components to conduct a surface deviation analysis. The software compares a test file against the reference file (original CAD model) and shows the variance comparisons clearly on a color map, allowing engineers to quickly zoom in on problem areas that exceed the tolerance levels.
As is evident, the automotive industry is heavily reliant on advanced measurement tools and methods across the various vehicle production stages. While measurement technologies improve a manufacturer’s productivity and product quality, they most certainly benefit consumers as well. And as the automotive industry continues to evolve with market demands, the workflow and methods that support it need to develop and grow accordingly. Metrology suppliers that are quick to identify these changes can then offer automotive players nimble, effective solutions that best suit their requirements.
About Author
 Eddy Lek is the Product Marketing Manager for FARO in Singapore. He leads the product marketing group to formulate and drive product marketing strategies across Asia Pacific. Mr. Lek has extensive experience in product marketing, product management, and team management, with a focus on technology products. Prior to joining FARO, he worked for several global organizations, including Emerson Process Management, Rockwell Automation, and Keyence.

